
With the Staffbase connector for Power Automate, you bridge the gap between different tools and systems and include the Staffbase platform in your automated workflows. Leverage the power of automated workflows that include your employee app or intranet to automate processes, run tasks on a schedule, or notify users as events take place.
Follow these steps to automate workflows with the Staffbase Connector:
Configuring the Staffbase Connector
Prerequisites
- You have the role of Power Automate Administrator or a higher role in Microsoft 365.
- You have a premium account in Power Automate.
- In Power Automate, navigate to Data > Connections.
- Click Create a connection or + New connection.
The list of connectors open. - Locate Staffbase connector on the list.
- Click + to create the connection.
The dialog to create the connection opens.
- In the API Token field, add the API token using the following syntax:
Basic [API-Token]
You need to add an empty space between 'Basic' and the API token.
- In the Hosting ID field, enter the identifier for the infrastructure where your Staffbase platform is hosted:
- German hosting infrastructure: de1
- US American hosting infrastructure: us1
- Click Create.
Setting up a Workflow With the Staffbase Connector
You can create workflows based on your business processes. In addition to using the Staffbase connector, you can use other connectors available in Power Automate to enrich your workflow and automate your business process.
Prerequisite
- You have a Power Automate license.
- In Power Automate, navigate to Create.
You can also modify an existing workflow to add the Staffbase platform to the workflow. - Select one of the following to create a flow based on your business requirements:
- Automated cloud flow
- Instant cloud flow
- Scheduled cloud flow
For detailed information on how to create these workflows, refer to Power Automate documentation. - Create a flow by selecting a trigger or by providing the details.
- Click + New step to add steps to the workflow.
The Choose an action dialog opens. - Search for the Staffbase connector and select it.
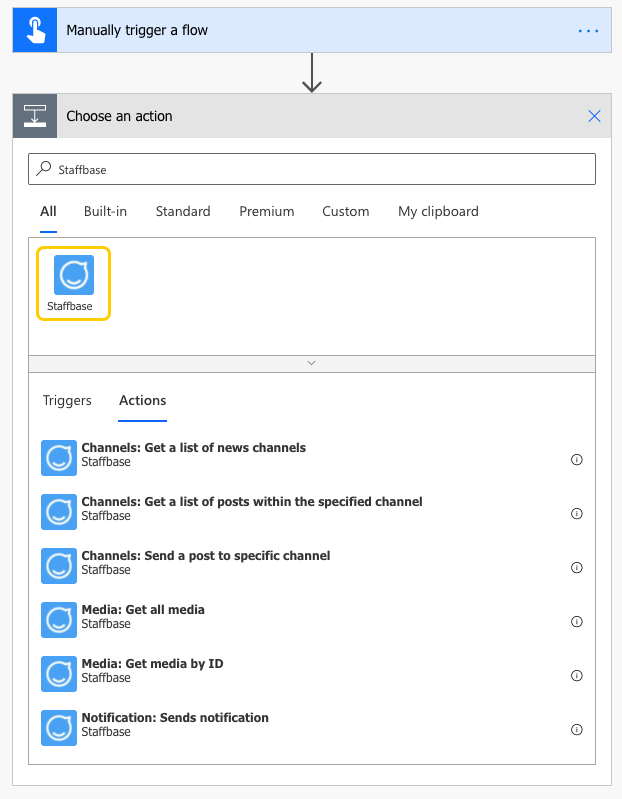
- Select an action from the Staffbase connector.
Only predefined actions are available. - Similarly, you can create additional steps using other connectors.
You can also create steps using other connectors before the step based on the Staffbase Connector. - Click Save.
You have configured the workflow in Power Automate.
Example:
In this workflow notifications via email and mobile are sent to users upon form submission.
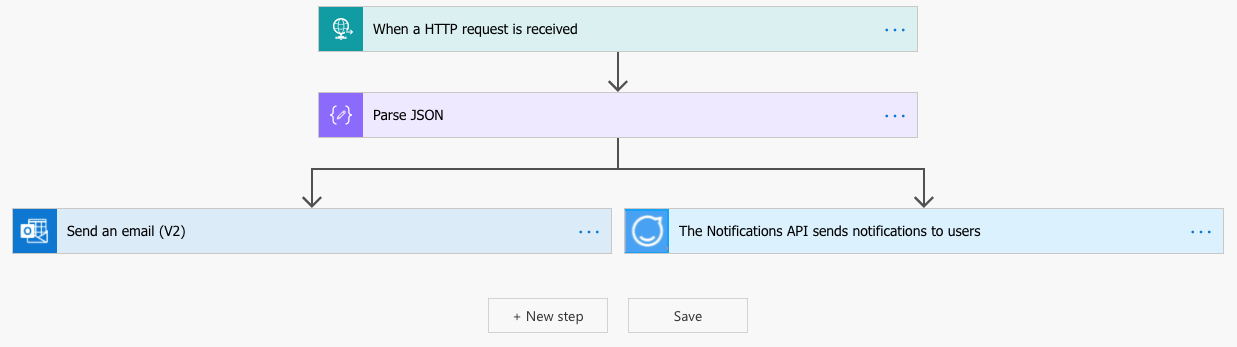
In this workflow notifications via email and mobile are sent to users upon form submission.
Testing Your Workflow
Test your workflow to ensure that the automated workflow runs as expected.
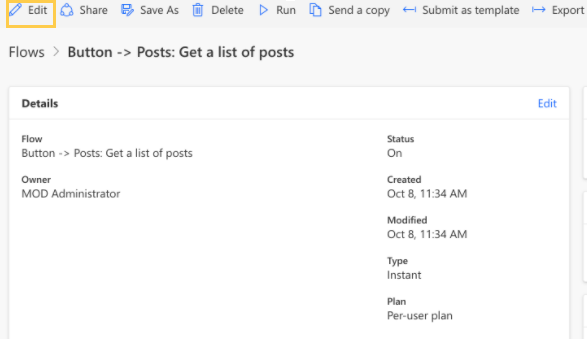
- In Power Automate, navigate to My flows.
- Click the flow you want to test.
A new page with the flow details opens. - Click Edit at the top of the page.
- Click Flowchecker to ensure that there are no errors or warnings in the workflow you created.
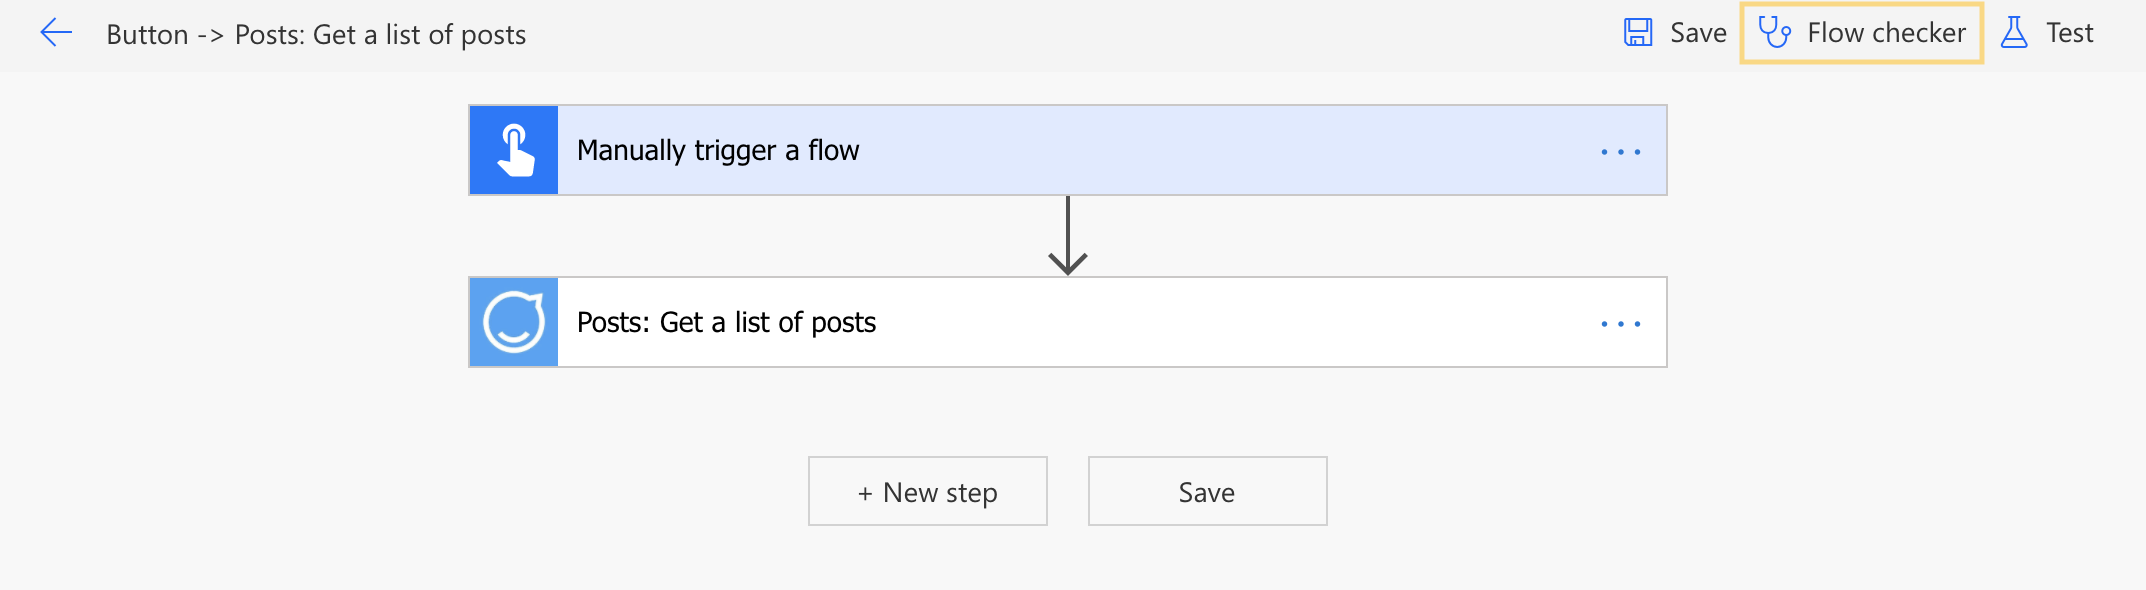
- Click Test to test run the workflow.
The Test Flow dialog opens. - Select I’ll perform the trigger action.
- Click Test.
The Run flow dialog opens. - Click Run flow.
Comments
0 comments
Please sign in to leave a comment.